
Add signature in Outlook 365 (easy 1-min guide + screenshots)
- Follow this short guide to set up your Outlook 365 web app email signature
- Or use our Outlook Signature Creator to generate a professional Office 365 signature in 2 minutes
Create and set up a professional email signature:
Short answer
How to add signature in outlook 365 web app?
- Click the gear icon in the top right corner of your Outlook 365.
- Type in “signature” in the search box at the top of the Settings panel.
- Select the “Email signature” result.
- Create a new signature with the in-app signature editor
- Click “Save” when you’re done.
If done right, adding an email signature in your Outlook 365 will definitely make a professional impression.
If your livelihood depends on your digital presence then setting up an Outlook signature is one of the most cost-effective ways to get more people to contact you, garner respect and create business relationships. Can you afford that your colleagues and competitors have one of these and you do not?
This short guide will show you how to create, add and set up an Office 365 email signature in 7 simple steps. Just follow the instructions below.
Video guide: Add signature in Outlook 365
In case you prefer to watch rather than read, we’ve prepared a video guide for you.

How to add signature in Outlook 365 web app: your step by step guide
Note:
Using the integrated editor in Outlook 365 you can add text, links, and images, but it’s quite hard to use this editor to create a professional looking email signature. For better results, with less effort, consider using our Outlook signature creator
To
Subject

Professional Outlook 365 web app signature | See more templates below
Step

Find email signature editor in Outlook 365 settings
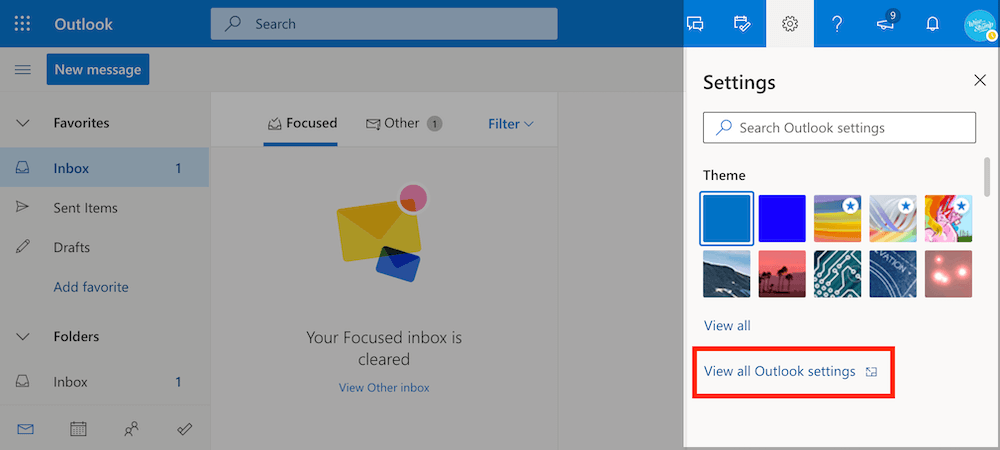
- Sign in to your Outlook in Office 365 or Outlook web app.
- Click on the gear icon for Outlook Settings in the top right of the screen > Scroll down the settings menu that opens on the right > Click on “View all Outlook settings”
Step

Open Outlook 365 signature editor
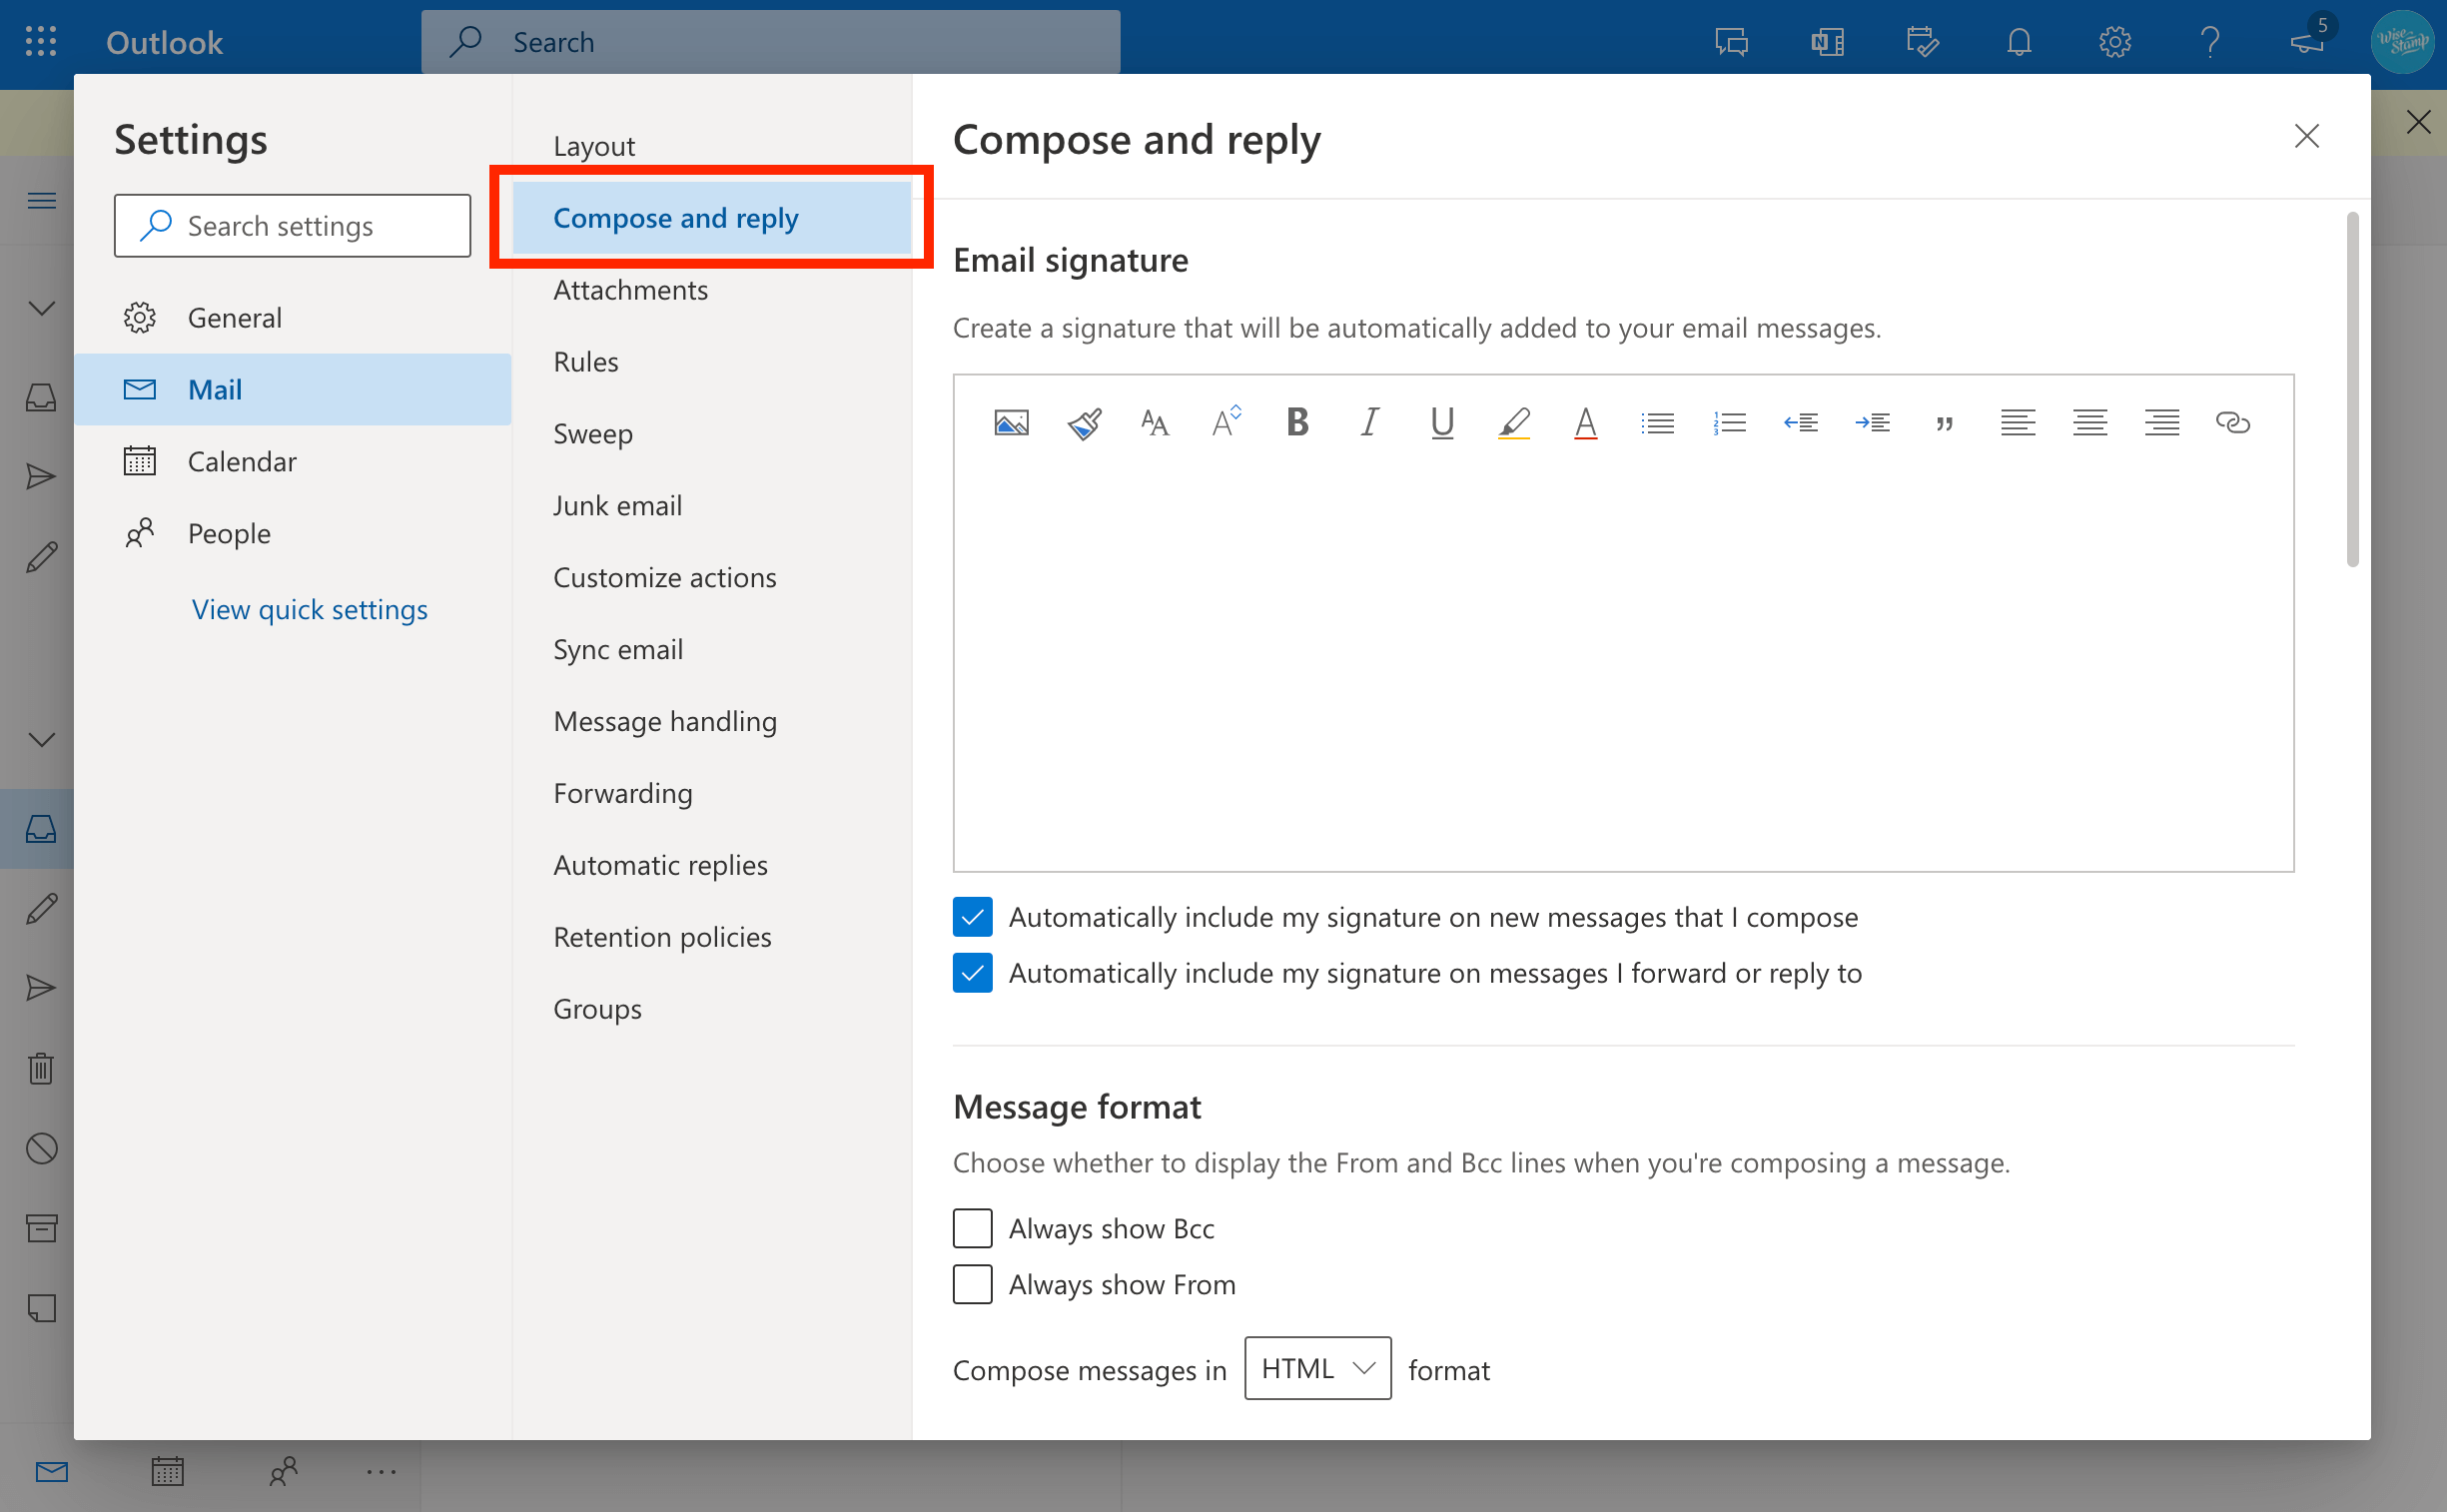
- Select “Compose and reply” from the left sidebar.
Step

Create new signature in Outlook 365

- Under “Email signature”, click inside the text box, and create your signature by simply typing in your details (It’s recommended that you use the accepted email signature format, as seen in the example)
Step

Edit your email signature design
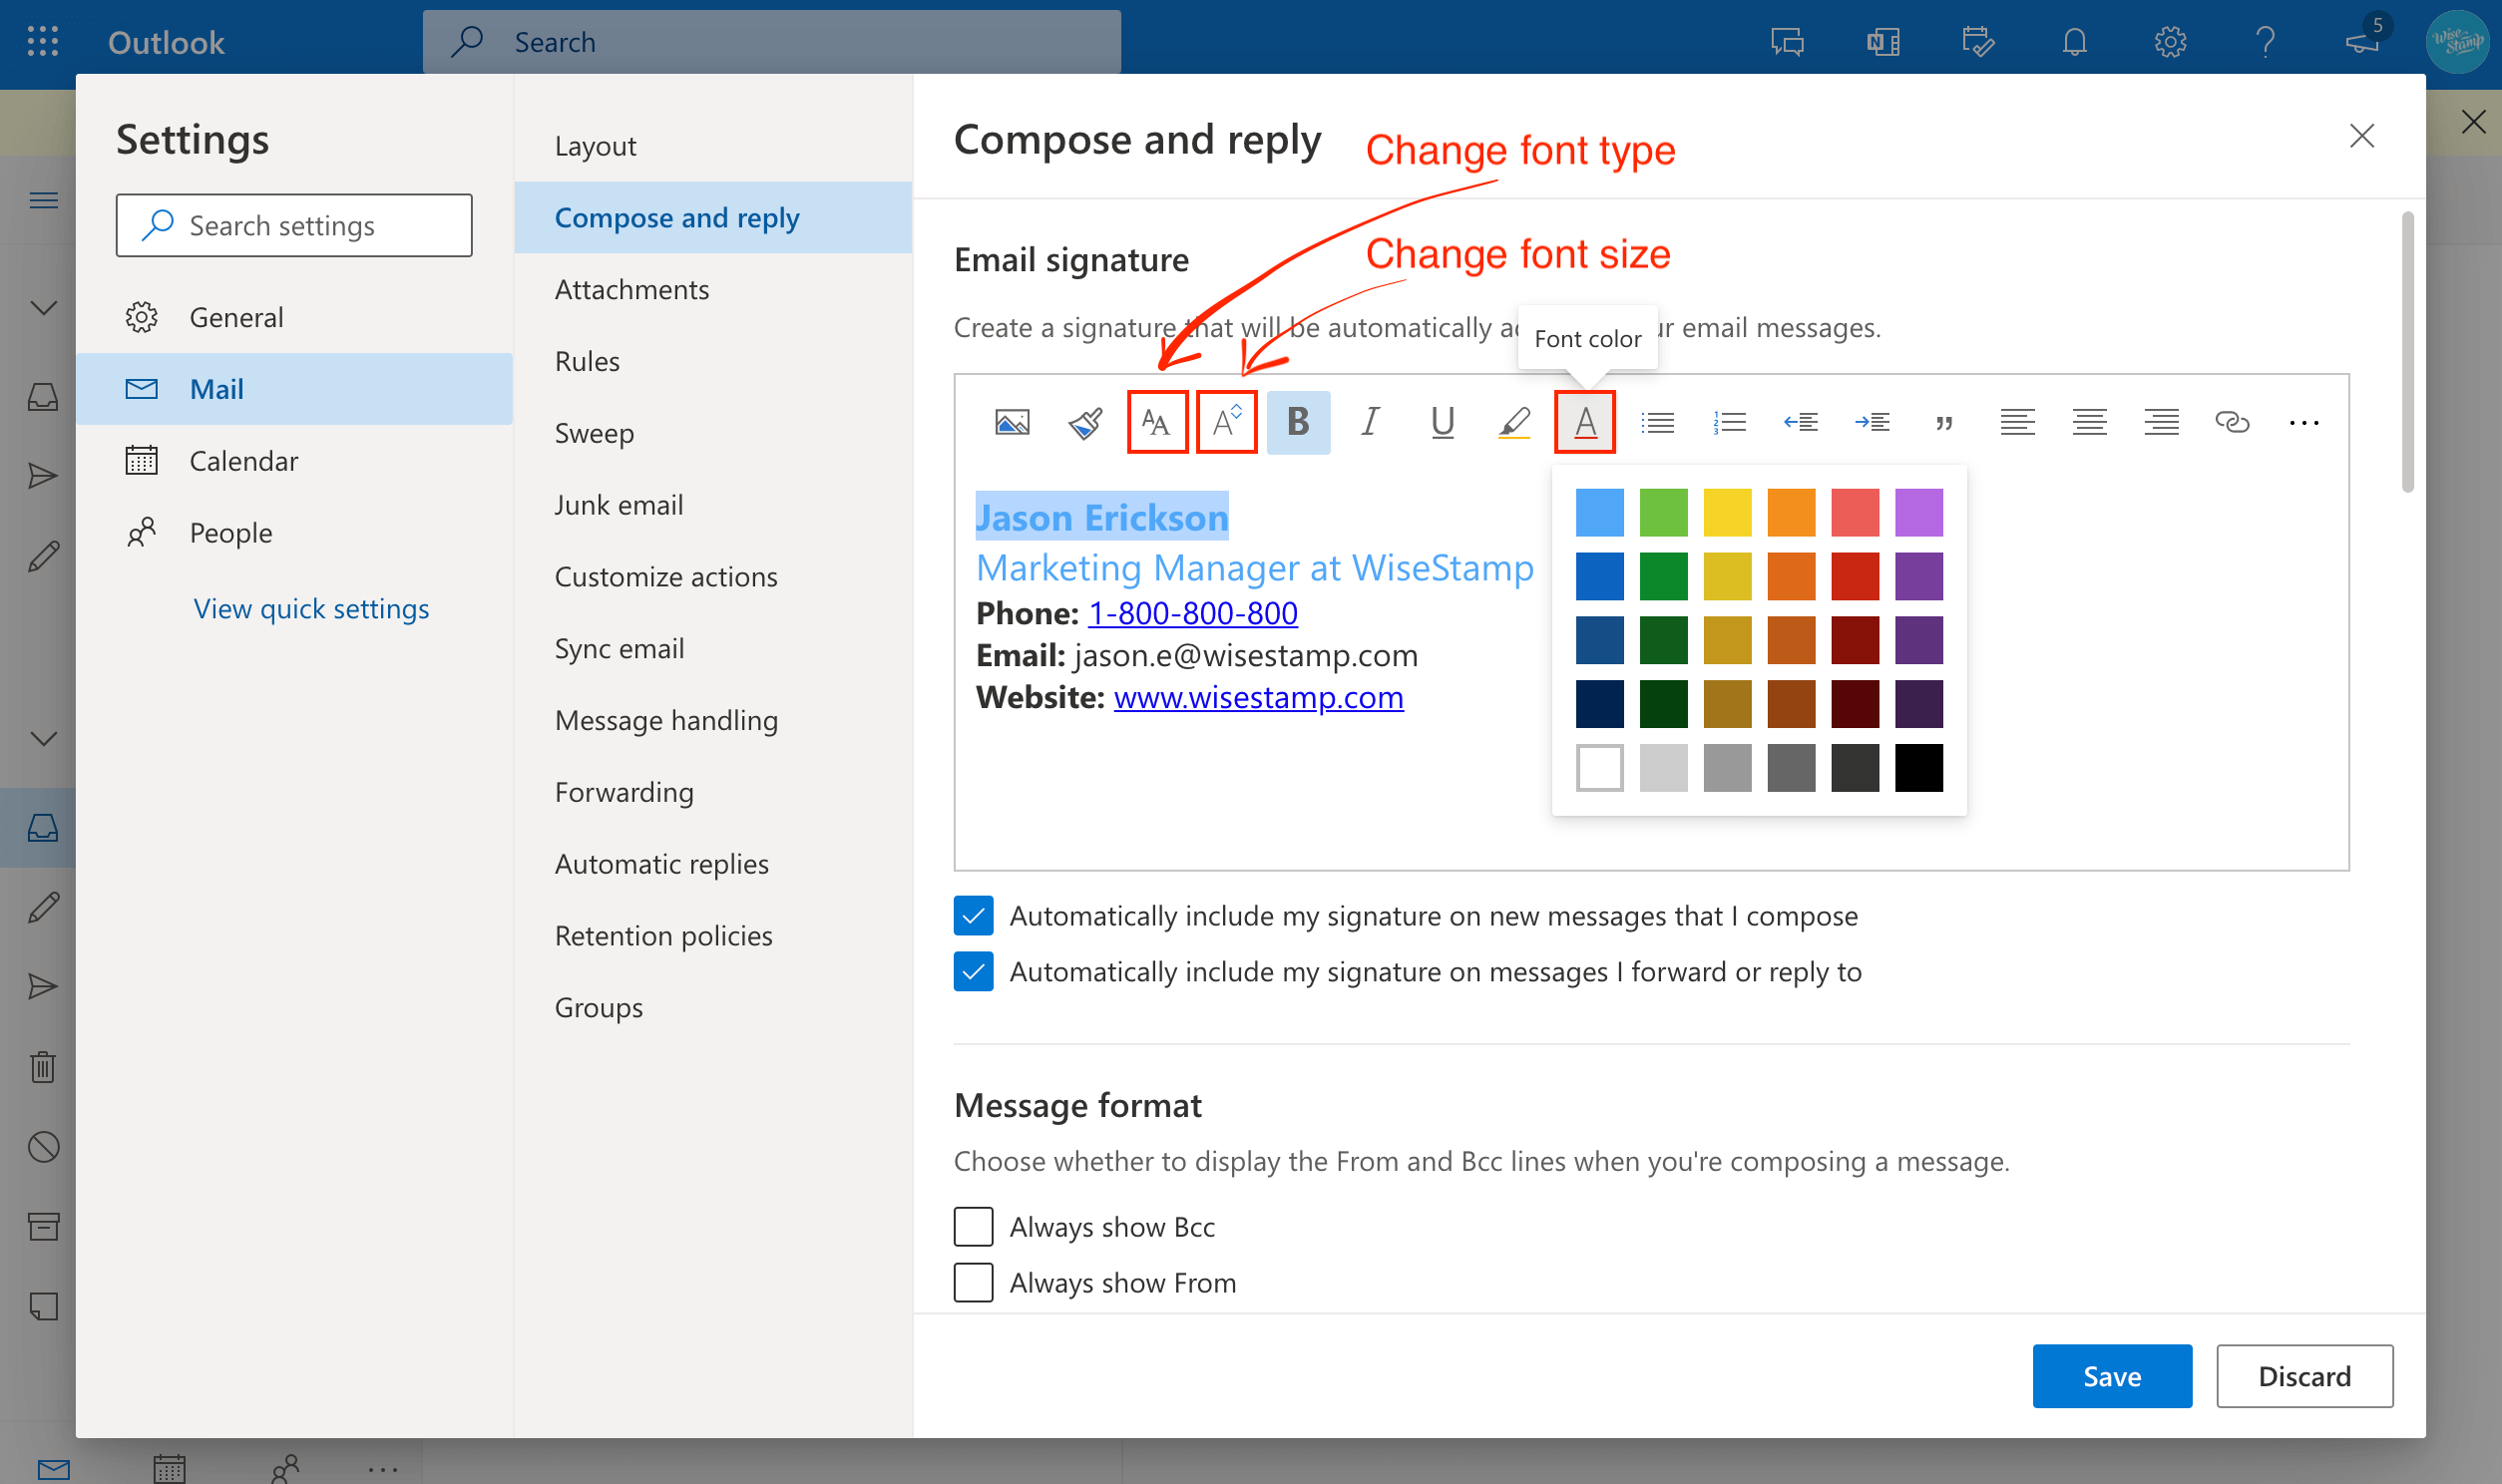
- Edit your email signature design using the tools in the top ribbon
TIP:
- Give your name and job title a bigger font than the rest of the signature (2-4 px will look best).
- Give your Name and your job title a different color than the rest of your signature (I recommend that you use your main brand color).
- Put your name, and your contact information labels in Bold (see example). You can also use capital letters instead of bolding.
- Choose a font that’s legible and respectable (use just 1 font type for your entire signature).
Step

Add a hyperlink to Outlook 365 signature
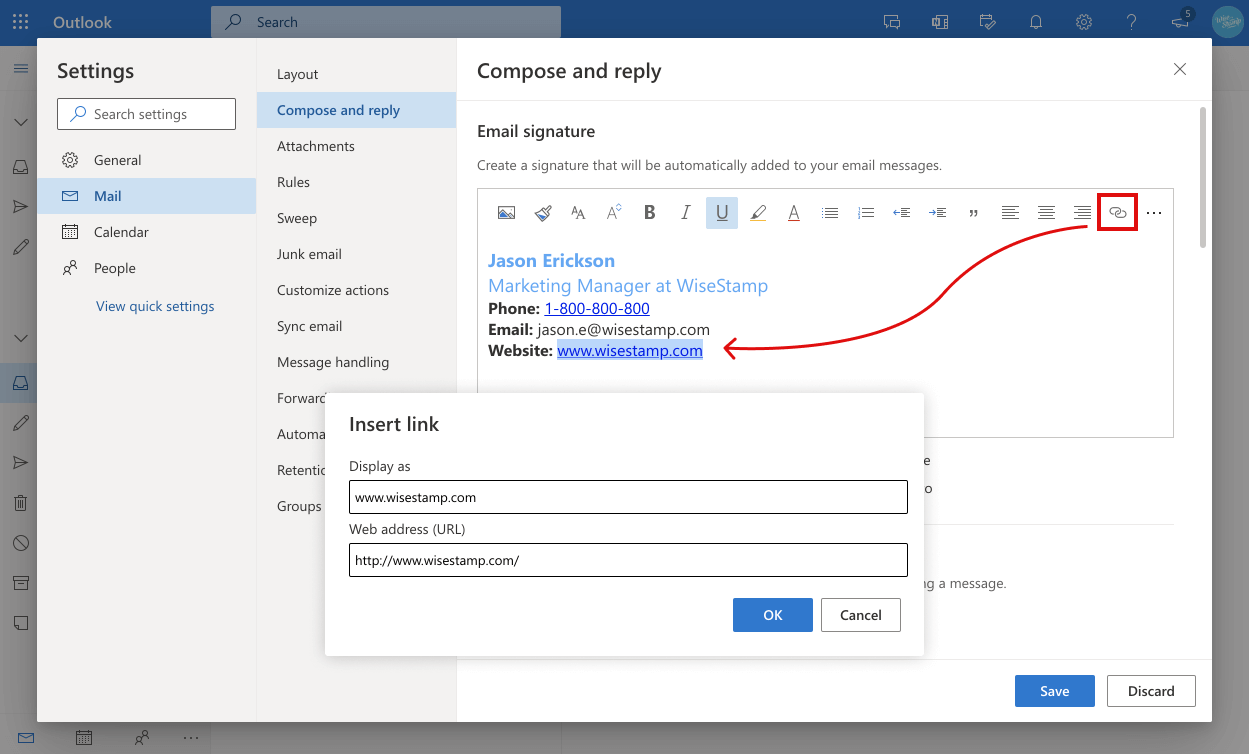
- To add a hyperlink to your signature, select the text you’d like to make clickable (when selected the text will get a blue background)
- Click the link icon in right of the tool strip
- Add in the URL (web address) where you want your hypertext to link to
Step

Make email signature phone number clickable

Select the number, and click the link icon from the tool menu, in the same way you did text in the previous step
Add the prefix “tel:” then type or paste in your phone number. E.g. tel:1-800-800-800. After that anybody that clicks the number in their mobile device will see the number open as an outgoing call in their device
Step

Add image to Outlook 365 signature
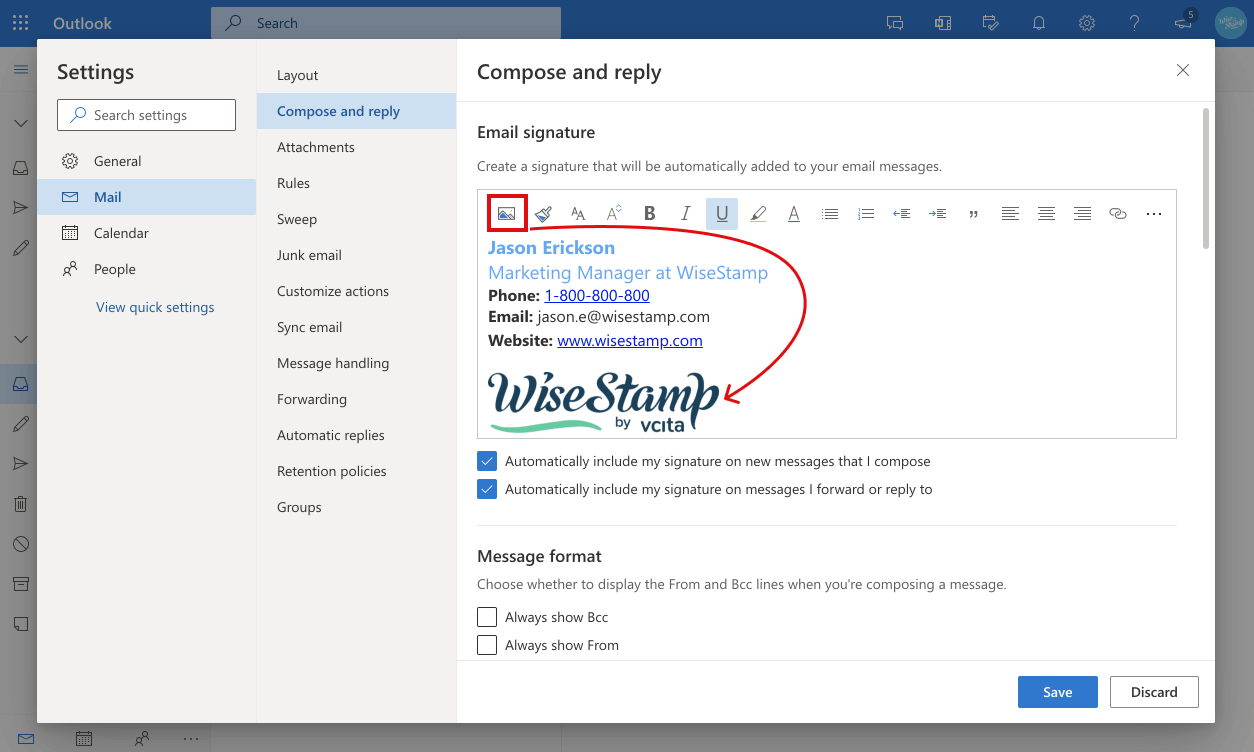
- To add an image to your Outlook web app signature click the image icon in the tool strip
TIP: you can only upload an image from your computer. Adding an image from a URL is currently not possible in Outlook 365.
- Drag and drop, or cut and paste your image into the position you’d like it to be in
- Play with the image size till you find the best visual fit within your signature block
- To make your image clickable, simply click on the image and hit the link icon from the tool strip, then add the URL you’d like the image to link to
Note:
Notice that you can’t place the image besides your signature text without the signature structure breaking. To achieve an advanced signature design with the image on the side, I recommend that you try the WiseStamp Outlook signature creator. It’s free.
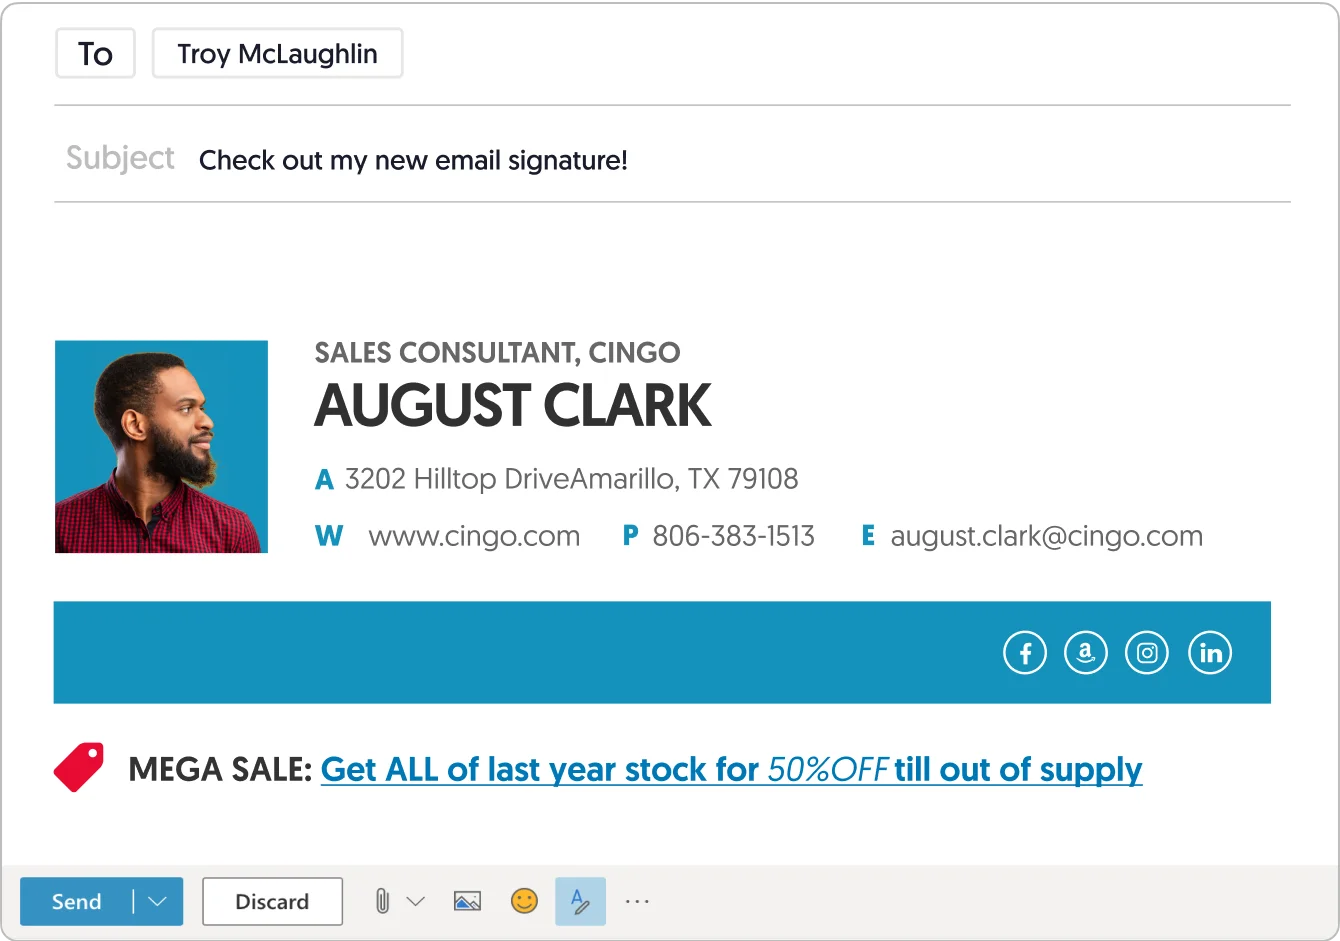
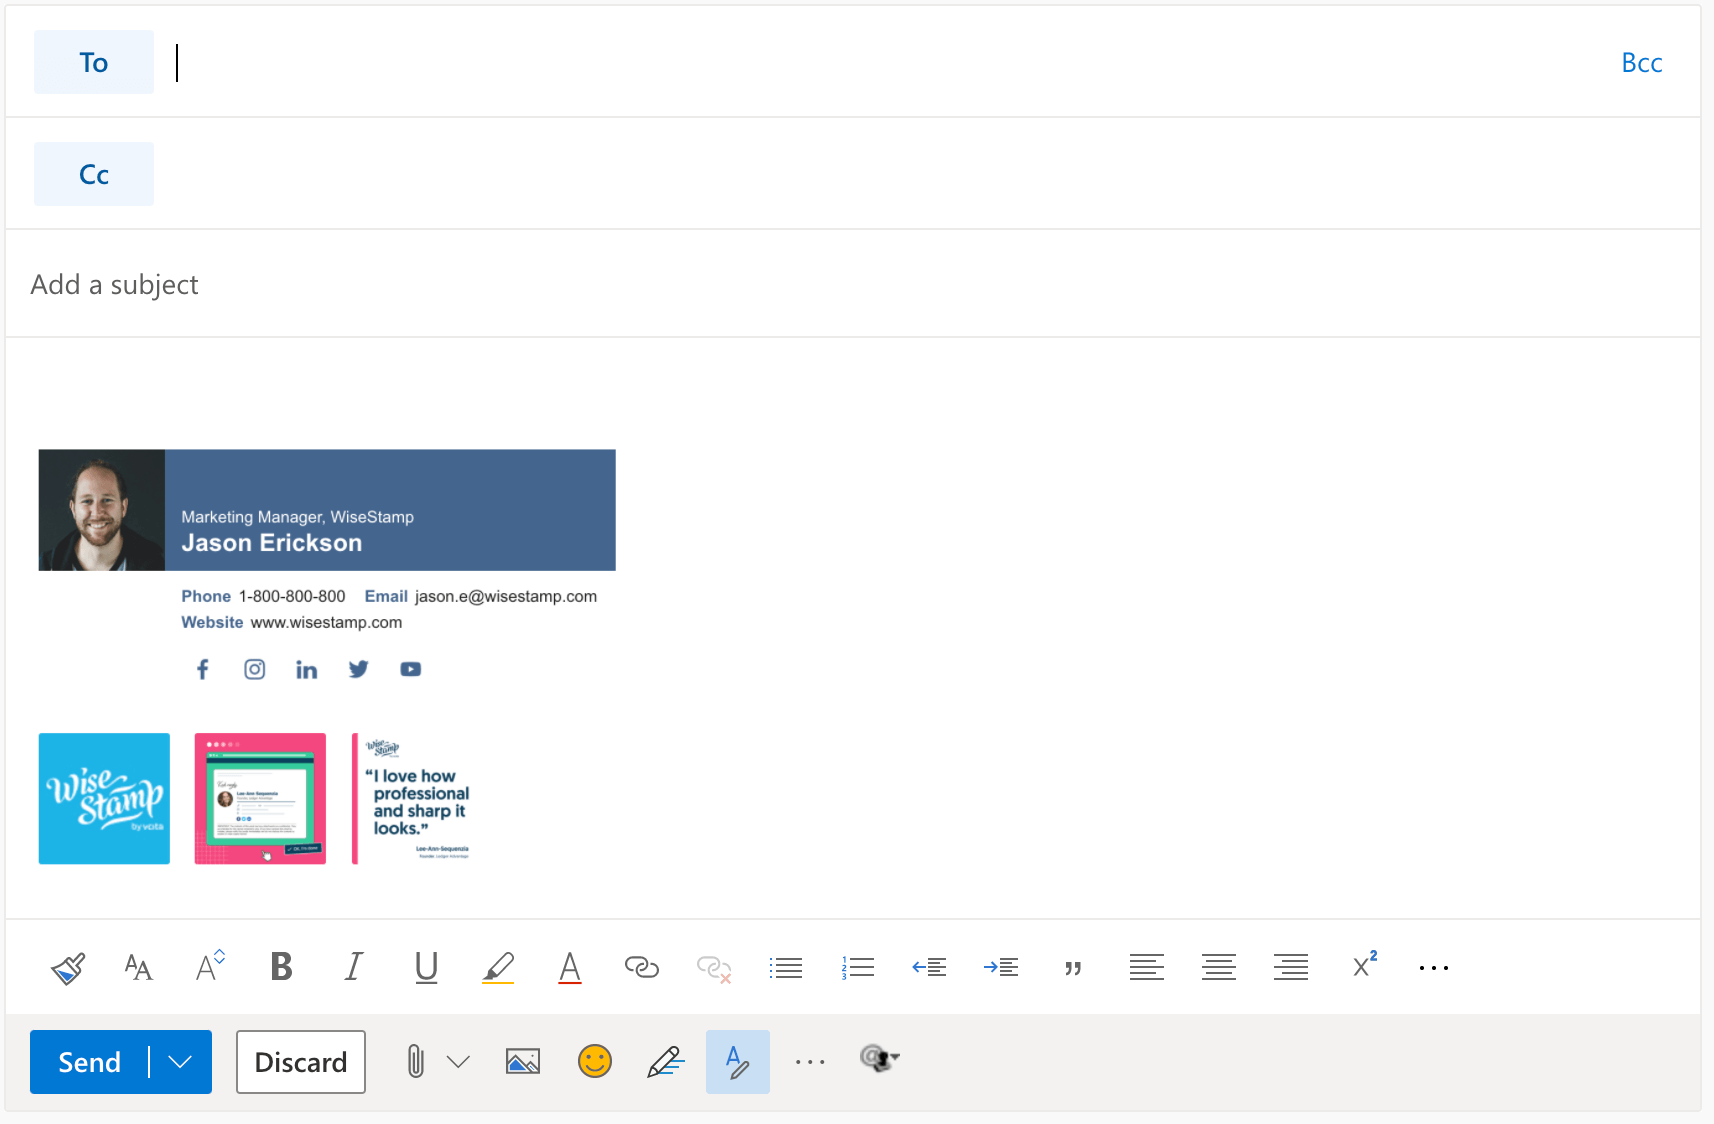
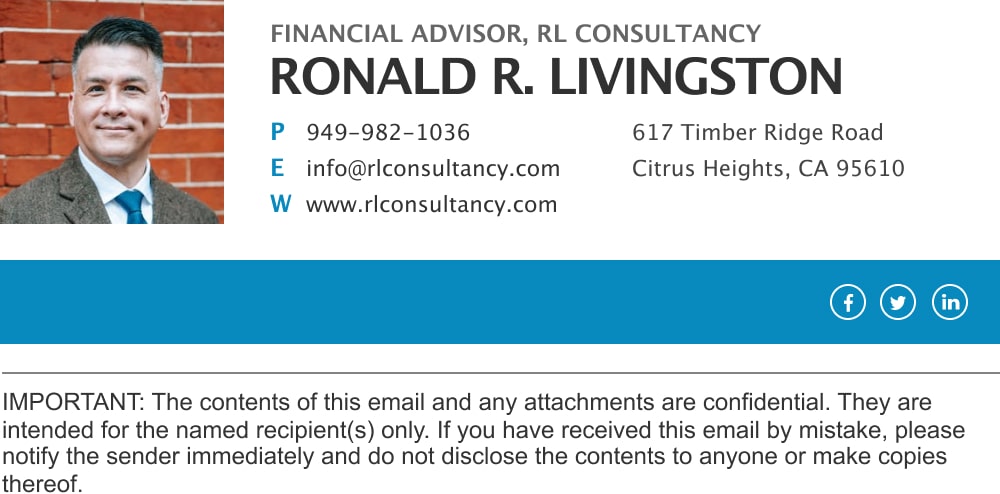
Build beautiful email signatures like in the example below in just 2-5 minutes.
To
Subject
Created with WiseStamp
Step

Set automatic Outlook 365 email signature
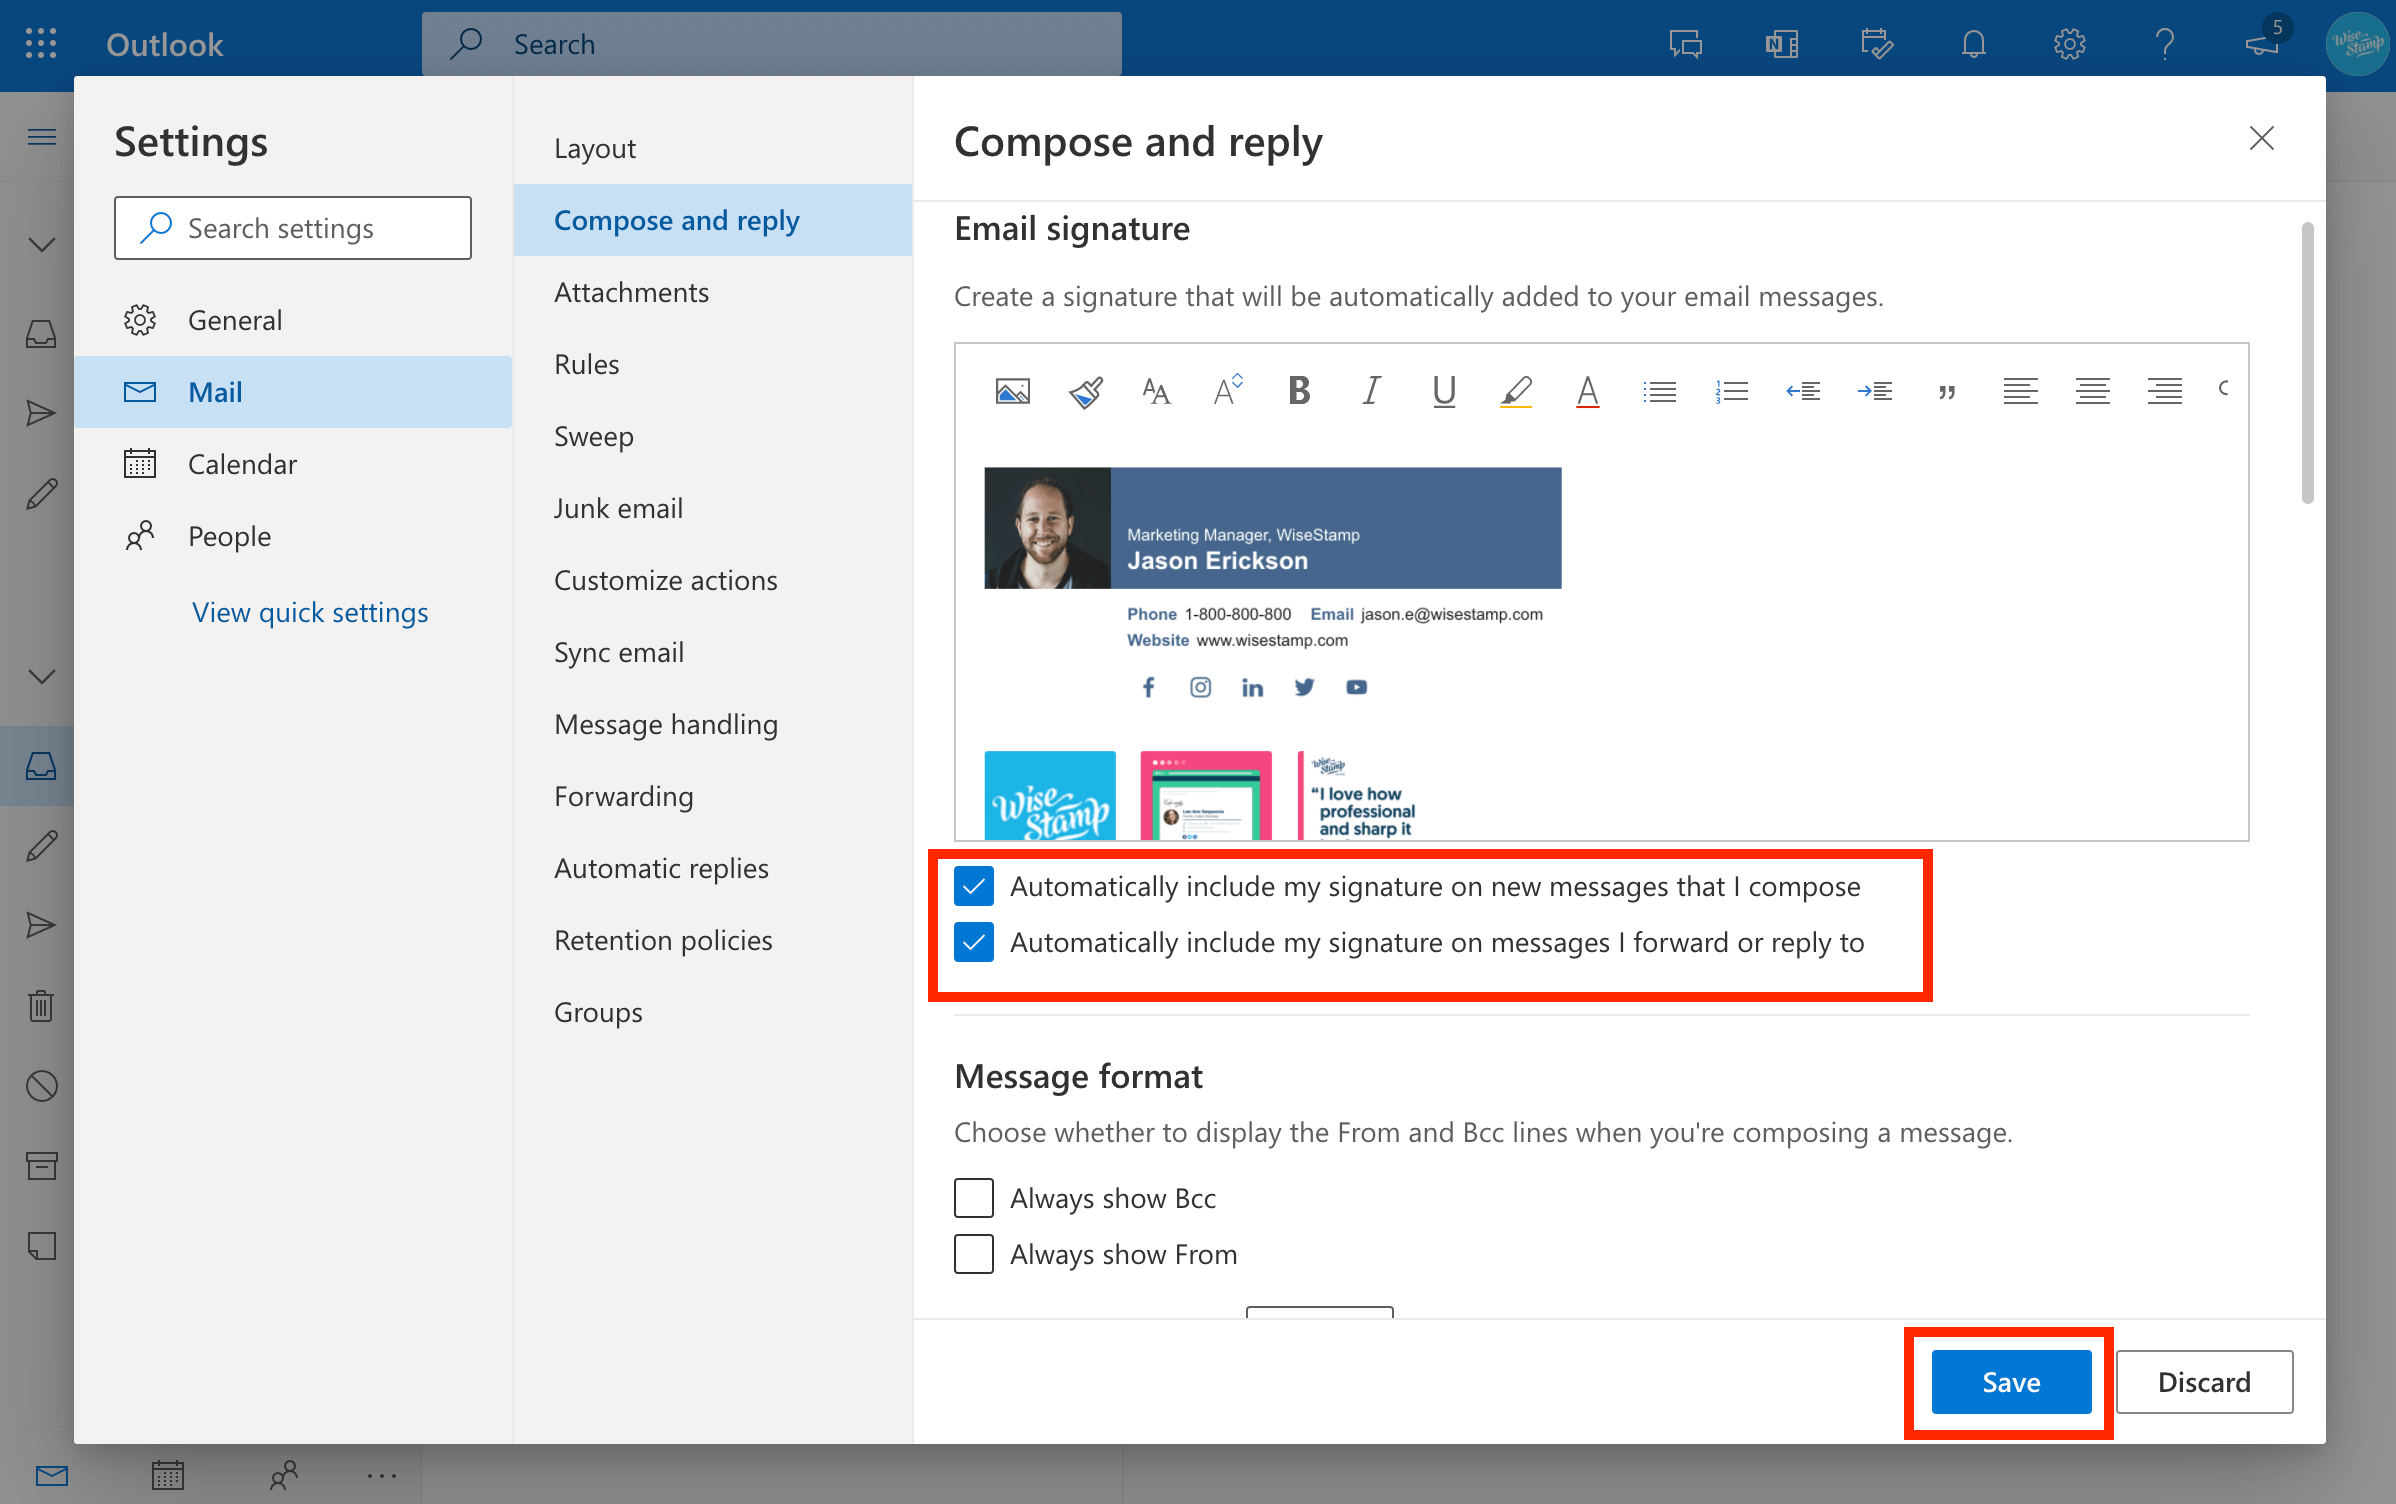
- To set your signature to appear automatically make sure that the 2 default signature checkboxes for “new messages” and for “forward or reply” are checked (Outlook should check them as default option).
Step

Save your signature and you're done!
- Click “Save”. That’s it, you’re all set up. You’ll now see your new signature each time to compose a new message
- You can go back and change your signature at any time
How to add your signature to a single email
By default, Outlook will check 2 checkboxes at the bottom of their integrated editor. One is for automatically adding your new email signature to every new message that you send and another one is for adding the signature when you “Reply” to received emails. Be sure to uncheck either box if you don’t want Outlook to automatically add your signature.
If you uncheck both boxes you should consider simply copying and pasting your ready-made email signature into your new message window, on those occasions that you want to use it.
Copy-pasting manually is also a good option if you like to use different signatures for different occasions. Since Outlook 365 doesn’t allow for more than one automatic signature per account.
Easily generate a professional Outlook 365 signature
Instead of working hard to create a signature using Outlook’s editor, try using a signature generator. The best part is that you don’t need to manually set up your signature in Outlook. The Wisestamp editor will do it for you with a 1-click.

Take these steps to create a professional Outlook web email signature in 2-5 minutes:
- Go to WiseStamp’s free email signature maker.
- Add your professional details.
- Go to the Templates tab > Choose a designed template.
- Go to the Social tab > add social media icons and links.
- Go to the Design tab > refine the design for your signature dividers, icons, and photo.
- Go to the Add-ons tab > add buttons, banners, legal disclaimer, Instagram gallery, and more useful features. You can add an image or a logo and a lot more.
- Click “OK I’m done”, and you’re set.
After you set up your signature you can go back and change it or update it at any time, and we’ll automatically update your 365 or OWA signature.
Add images, links and social buttons to your Outlook 365 signature
To learn how to enrich your signature with some added features be sure to hit our 1-minute guides from the list below.
Office 365 email signature templates you can use as your own
To
Subject

To
Subject
To
Subject
To
Subject

To
Subject
To
Subject

To
Subject

To
Subject